Monday, March 7, 2016

French Lemon Tart


If you like lemons, this unique and citrusy desert is for you! Even if you don't like lemons, give it a try. It has a lightness similar to a chiffon pie but the tartness of a lemon drop!

Ingredients:
9-inch pie crust 
5 eggs
3/4 C sugar
4 lemons (zested and juiced)
1 C cream
powdered sugar
lemon zest
whipped cream

Roll out your pie crust. Line a 9-inch pie plate/tart pan.


Put the pie crust and pan in the fridge. Chill for thirty minutes.


Start on your filling. Beat the eggs and sugar together. Add the lemon zest and juice (reserve one tablespoon of zest for garnish). Whisk in the cream. Chill for one hour.


Put the pan with the pie crust from the fridge. Line the crust with wax paper and pour in pie weights or dried beans. Bake for 10 minutes at 375 degrees. Remove the wax and weights/beans and bake for five more minutes. Remove from oven.


When time's up, remove the filling from the fridge. Put the tart/pie pan on a baking sheet and pour the filling into the prepared crust.


Reduce the oven temperature to 275 degrees. Put the baking sheet with the tart into the oven. Bake 40 to 45 minutes or until set (just jiggly in the middle). Remove from oven and set aside to cool. Dust with powdered sugar.


Top with whipped cream and lemon zest.


Serve at your leisure!


,astef,
,amaa

Monday, February 29, 2016

Old-fashioned Baked Mac and Cheese

This fun little gem came from a cookbook group I participate in on Facebook. Someone found a cookbook from the 1930s. I'm talking back in the days when people make their own maraschino cherries.

It was FASCINATING. And for the most part, extremely unappetizing! Just my opinion, of course, but FYI, your memories of "Grandma's cooking" might be better than Grandma's cooking actually was. Unless you enjoy creamed everything. (Creamed eggs, creamed spinach, creamed ham, creamed chicken, creamed peas... you get the idea.)

Anyway, we mailed the book around to each other and each person picked two recipes to try at home. Of the two I picked, one was really very average and ho-hum. But this one, a clarion call to a day before Kraft Mac and Cheese, was actually quite excellent. I made a few modifications (I think the only spices the cookbook used was salt, if that's considered a spice) and would actually make this again!

Oh, and the measurements were so laughable. Things like, "noodles. butter." Yeah. No measurements. Cookbooks have come a long way.


Ingredients:

8 oz. noodles, prepared
1 C soft bread crumbs
1/2 small onion, minced
1/2 green pepper, chopped
1 T butter
12 oz. grated cheddar cheese
1 C milk
1/2 C heavy cream
2 eggs
salt and pepper to taste
paprika for garnish


1. Saute the onion and pepper in the butter for five minutes over low heat until softened.

2. Remove from heat. Mix the noodles bread crumbs, and cheese together.


3. Add in the eggs. Mix well.


4. Add the onions and pepper mixture.


5. Finally, stir in the milk and cream. Season with salt and pepper.


7. Pour into a greassed 2-qt baking dish. Bake at 375 degrees for 45 minutes.


7. Serve!


    ,astef,
           amaa

Friday, February 26, 2016

Cookbook News!

I heard from a publisher today that is seriously considering publishing my Brazilian cookbook.

There's one catch though, and it's a big one. They want to know how many followers I have. They want to know how much interest there is in this cookbook.

I know there's interest. Everyone I talk to in real life and on the internet is interested. But I can't PROVE it. I have no numbers to back it up.

So please help me make this dream a reality! Over to the right is an orange box that says "followers." Click "Join this site" and my numbers go up. Come and visit my blog every time you see I've posted a  new recipe, and I can show them that I'm getting attention. That there's interest. That people support me.

That's it. That's all you have to do. You don't have to leave comments (though I love it if you do!) and you don't have to sign up for a weekly mailer (I don't have one). But you are certainly welcome to spread the word to everyone you know.

Thank you for stopping by and thank you for at least checking what this is about!
(I love that face. Isn't it stinking cute?)

Thursday, November 19, 2015

Low-carb (and sugar-free!) Pumpkin Pie

As we are a week out from Thanksgiving this year, I feel like it's the perfect time to share this recipe: a low-carb, sugar free pumpkin pie!

This year I was asked to make pies for a wedding. It's not the first time I've catered for a wedding, or the first time I've made masses amounts of pie. It was, however, the first time I'd been asked to make sugar-free pies.

Before I committed to making sugar-free pies for the diabetic groom and his family, I had to make sure I could make them. So I set out experimenting and trying different recipes. Of all of them, the pumpkin pie was my favorite. I'm a huge fan of full fatness and full sugar in my desserts. But if you can't have that, or don't want that, this pie is an excellent substitute for the real thing.

Oh, one more note. I used a regular lard pie crust, as the engaged couple said they'd prefer that. Of course, that adds a lot of your carbs back in. So you can either not eat the crust, find a low-carb crust, or just not worry about it. :) The rest of the pie is good for you.


Ingredients:
2 C pumpkin puree (or one 15 oz. can)
2 eggs
3/4 C sucralose (such as Spenda)
1/2 t salt
1 t cinnamon
1/2 t ginger
1/4 ground cloves
1 1/2 C heavy cream
1 unbaked pie crust


Roll out the pie dough and line the pie plate. Crimp the edges.

I'm a huge fan of fresh pumpkin and use it exclusively in my pies. So here's instructions for that, if you're interested.

Cut your pie pumpkin in half. Scoop out the seeds. Place both halves in a microwaveable bowl, add about 1/4 C water, cover with plastic wrap, and microwave on high for about 15 minutes. Let it cool. The skin will peel right away from the pumpkin flesh, leaving you beautiful fresh pumpkin ready to be pureed.


Puree it. Don't just smash it or you'll have strings. I use an immersion blender (wonderful tool). A food processor would work too.


If desired, measure out two cups worth. Some pie pumpkins will yield exactly that; others a little less, others a little more. In my opinion, it doesn't have to be exact, just close. 

Now, beat in your eggs. You want to beat this so your eggs get fully blended and no one ends up with a chuck of egg white in their bite.


Add the spices.


And finally, your heavy cream.


Pour the pumpkin pie filling into the prepared crust and bake in a 425 degree F oven for 15 minutes. Then lower the heat to 350 and bake another 40-45 minutes.


A word of caution: You don't want to overbake a pumpkin pie. Or cool it down too quickly. Both of those things make your pie more prone to cracking as it cools. The pie will STILL JIGGLE IN THE MIDDLE when it's done. Turn your oven off, pop open the door, and let the pie finish cooling--and cooking--inside the oven.


Then, if you still get cracks, accept the fact that pumpkin pie is tricky that way. And keep whipping cream on hand to cover it up. Besides, a few cracks never hurt anything.


Since I do use fresh pumpkin and especially because there's no sugar (which acts as a preservative), I recommend refrigerating this pie. But wait until it has fully cooled.

Isn't it beautiful?

Tastefully,
Tamara 


Wednesday, November 11, 2015

Cheddar-orange Rolls

(Note: I don't know why this post is centered. I've edited it back to left justification three times, and it just goes back to centered. So, it is what it is.)

I love sweet rolls. Who doesn't? I first fell in love with them when I discovered Cinnabon in the airport as a teenager. My goal after that was to create a cinnamon roll that was EVEN BETTER. Why not? It's just a matter of trial and error to create the right taste.

I do believe I have succeeded. But in order to keep these cinnamon rolls extra special, I only make them twice a year.

That's not the recipe I'm sharing, though it is amazing. 

Why bring it up, you ask? For two reasons: 1) Because I now make this recipe twice a year with my cinnamon rolls and 2) the dough is the same dough! so you can modify this recipe to make cinnamon rolls too.

But there's a story to these recipe, also. When I was in the eighth grade, I stayed the night with a friend whose mom worked at a hotel. In the morning, she brought us home rolls from the hotel. They were some kind of orange cheese sweet roll, and they were divine. I consumed way too many.

Fast forward twenty years, and I've searched high and low for that recipe. There are tons of cheese roll recipes out there. Even more orange rolls. But no CHEESE ORANGE ROLLS. So I created this. It's mine, all mine. And I like it even more than the cinnamon roll recipe, but that's just me! After you've tried it (and loved it), feel free to change it and make it yours, all yours!


Ingredients:
dough: 2 1/2 C warm water
2 T yeast
1/2 C oil
2 t salt
1 C sugar
6-8 C flour

filling:
1 C sugar
1/2 C butter
2 oranges, zested and juiced
2 C shredded cheddar cheese (other cheeses that would be good: Asiago, Havarti, Manchego, Gouda)

glaze: 
juice from the oranges
3 C powdered sugar

First, let's make the dough. I usually give myself two hours to get this done because it has to sit, then sit, then sit again. But it's not hard.

Mix water, sugar, and yeast together. Let sit for 15 minutes. Add the rest of the ingredients. Knead until smooth. Cover and let rise in a warm place for 1/2 hour.


Looks good!


Roll the dough out on a floured surface into a rectangle. There's no right or wrong here, just make it rectangular. (I roll out half the dough at a time because it's a lot of dough!)


Melt the butter and spread it across the rectangle.


Next, sprinkle on the sugar and blend it into the butter.


Add the orange zest. 


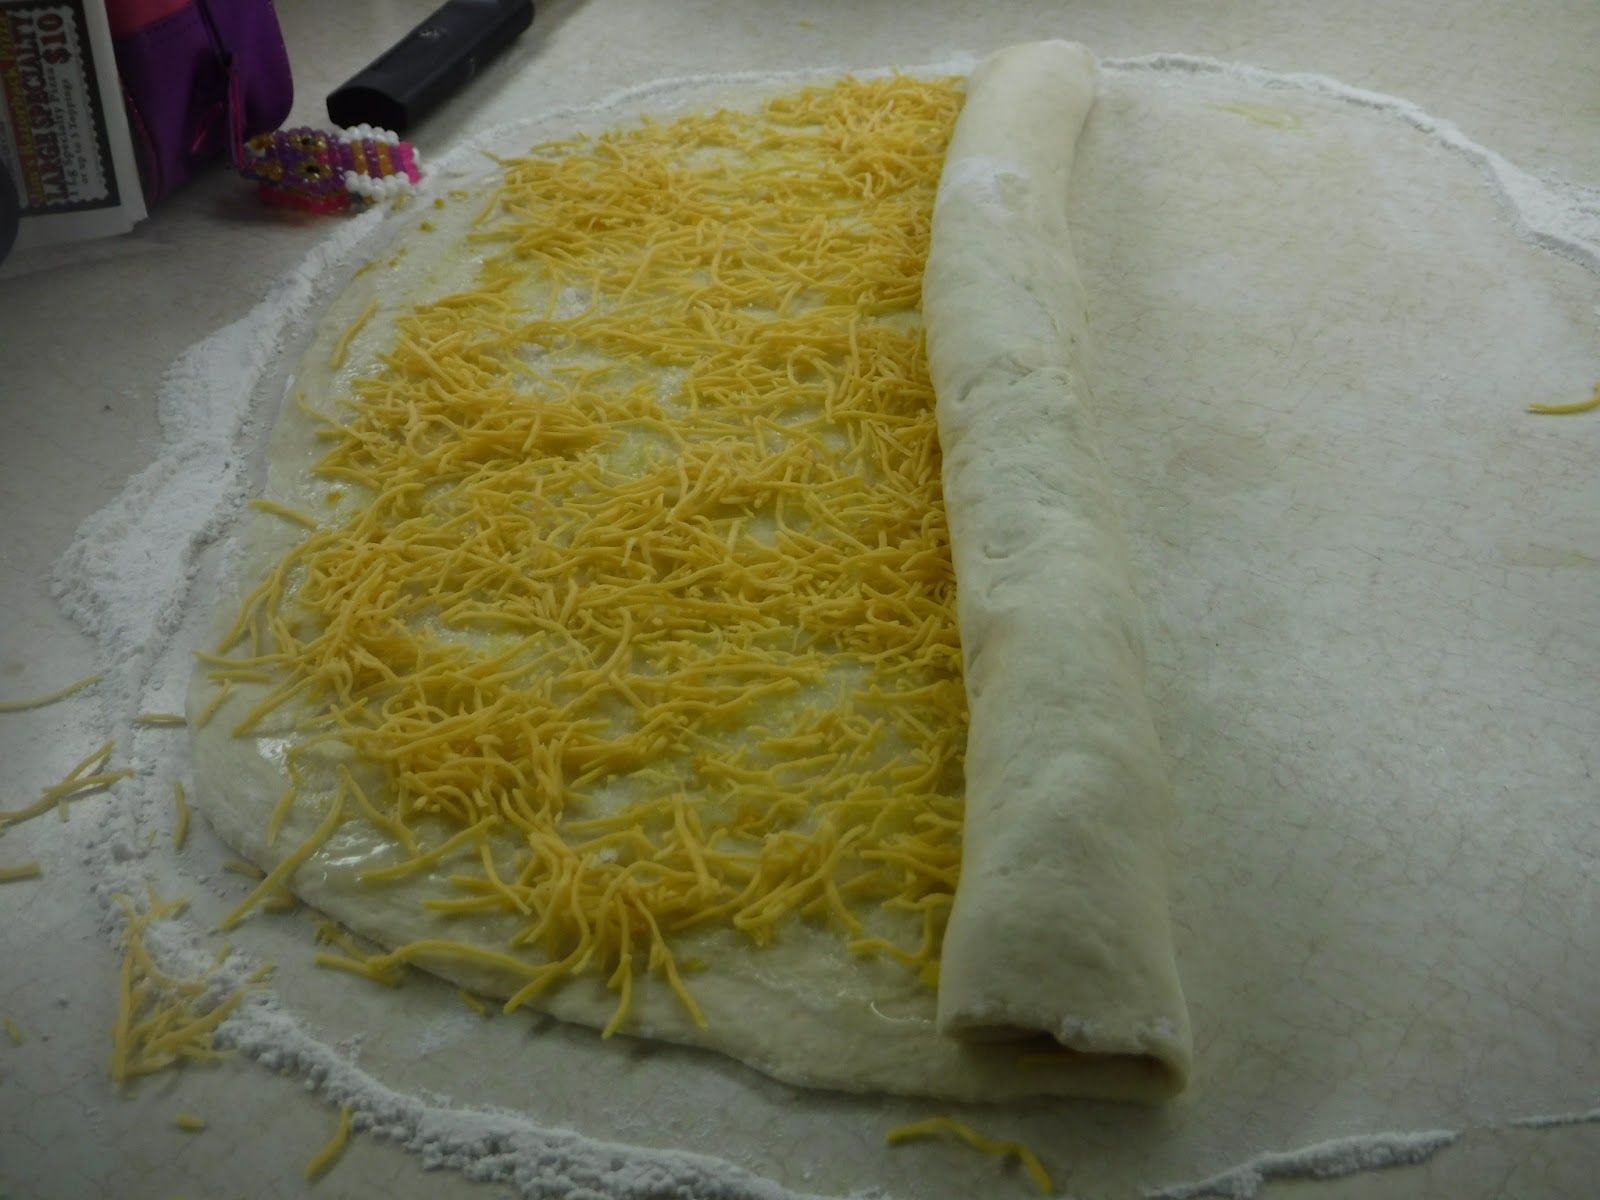
And the cheese!


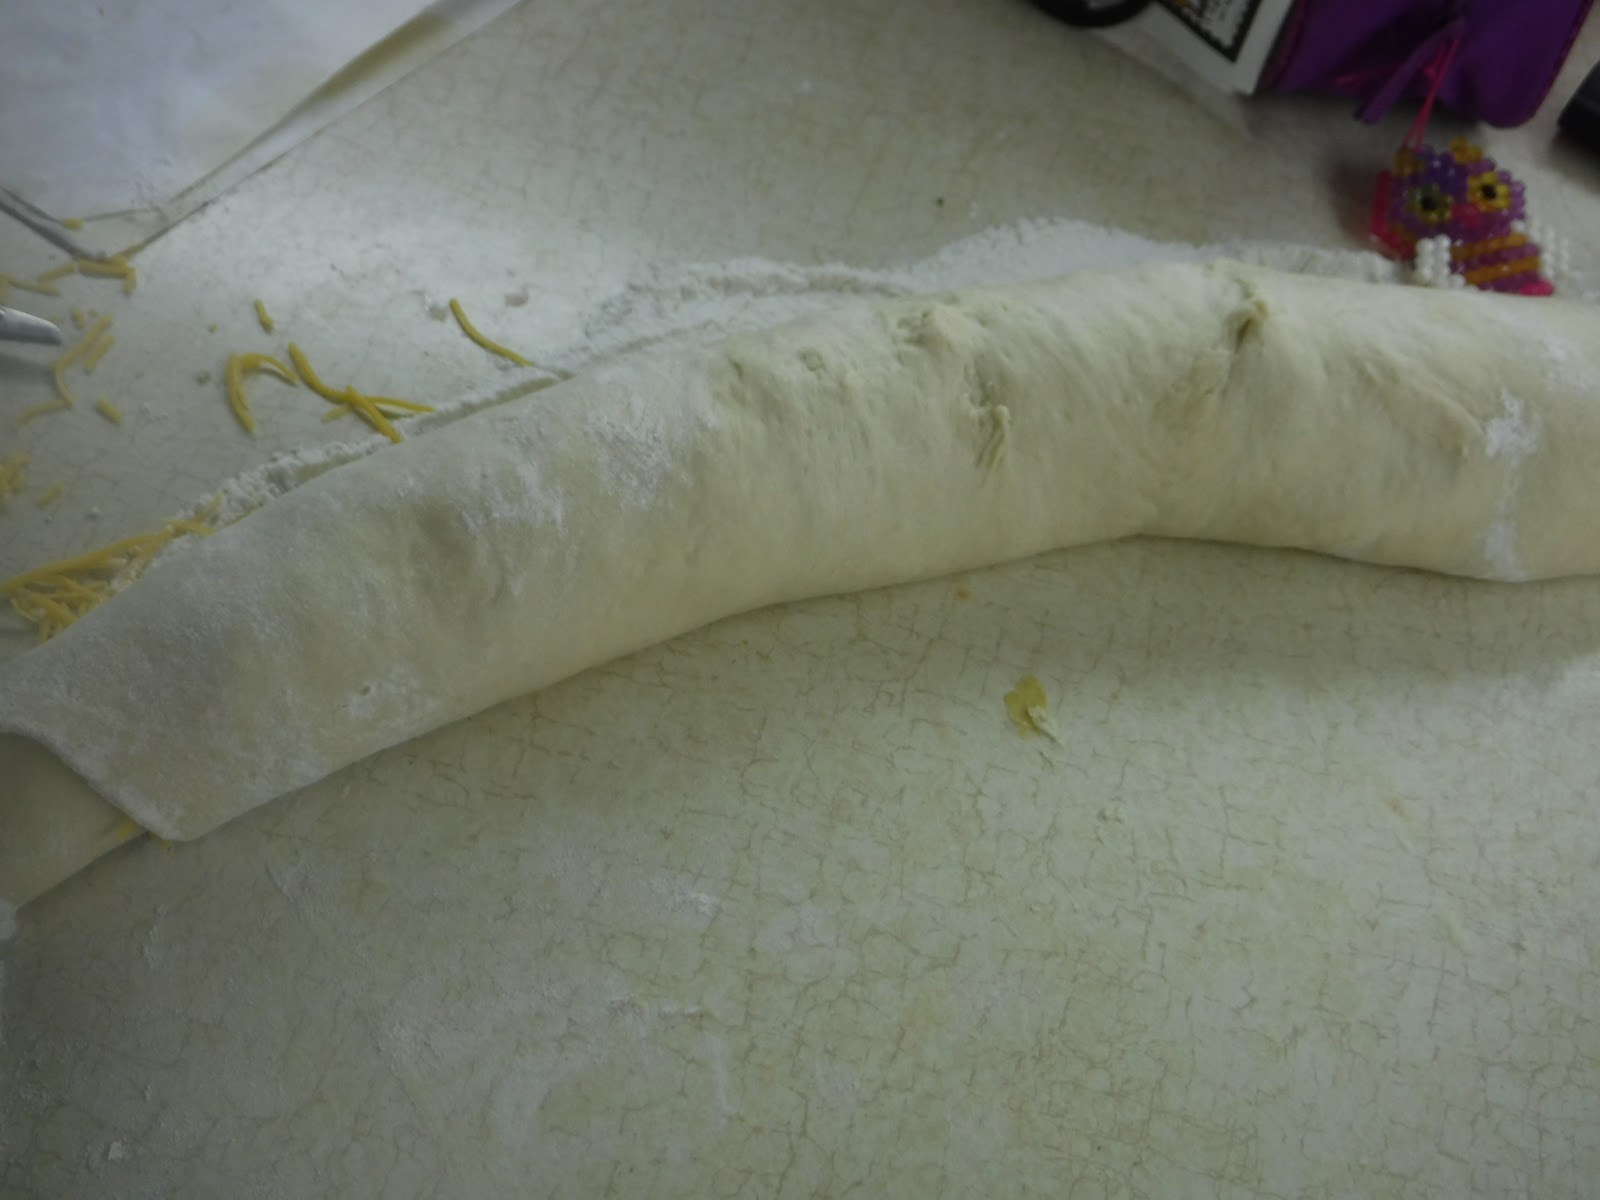
Roll up the dough, starting with the long end.


The rolled up dough.


Cut the dough with a sharp knife every two inches.


Lay out on a baking sheet, leaving space between each one.


Cover and let rise for half an hour.


Preheat the oven to 350 degrees F. Bake the rolls for 20 minutes.


This is them as they come out. Aren't they perfect?


Oh, and don't forget the glaze. You should make this while they're in the oven.

Mix the reserved orange juice and powdered sugar in a small saucepan over medium heat until the sugar dissolves.


Dissolved.

Pour over the rolls when they come out of the oven. 


Enjoy with a glass of milk. And yes, I did make cinnamon rolls at the same time. I made the full dough amount, then did half cinnamon rolls and half orange rolls. These are best warm, so nuke them for ten seconds in the microwave the next day and they're good again!


Yield: 24 orange rolls

Tastefully,
Tamara 

Tuesday, November 3, 2015

Keeping the faith

I've hit a bit of a roadblock in trying to get my cookbook published.

I've been actively pursuing publication, knowing that I myself cannot produce nor distribute the colorful, picture food memoir cookbook that I envision. I've had some wonderful responses from agents in the publishing world, including the encouragement to start a food blog (which is why this blog exists).

Last week I got the kindest, most bittersweet email I could expect to get in this line of work. The agent, who  has communicated back and forth with me for a few months, said that while my writing is lovely and the book proposal looks fantastic, until I am famous or have someone rich and famous behind me, she can't sell it. She can't market it. No publisher will take it.

This is how I feel.


Have you ever felt like there was something you wanted to accomplish--no, HAD to accomplish--but the ability to do so is simply out of your control? No matter how much you want it, your fate lies in the hands of another person?

I've felt this way before. And I feel this way now, about my cookbook. Basically I'm being told I'm still a nobody. And nobody will take a chance on a nobody. She did tell me that if my situation changes, she'd be happy to help me with my book.

Bittersweet. For once, I can say, "It's not my book, it's me."

And yet, despite this evidence glaring me in the face, despite the fact that only thirteen people will read this post (isn't it wonderful that I can see how many people visit my blog? LOL), I can't seem to let go of this dream. A part of me says, "Put aside this cookbook draft and work on something else, something that maybe will make you somebody." But the other part of me says, "I can't put it aside. It doesn't matter if no one believes in my work; I want this cookbook. I will write this cookbook."

Because I still have hope that I'm wrong, that's she's wrong, that somebody somewhere will back me up and believe. Believe in me. But I know that no one will believe in me if I don't believe in myself first.

So. Here we are. Keeping the faith.

Tastefully,

Tamara 

Recent Posts

Popular Posts

In my pursuit to getting a cookbook published, I'm trying to develop my credibility as a food writer, and not just an author.